
 Save to Pinterest
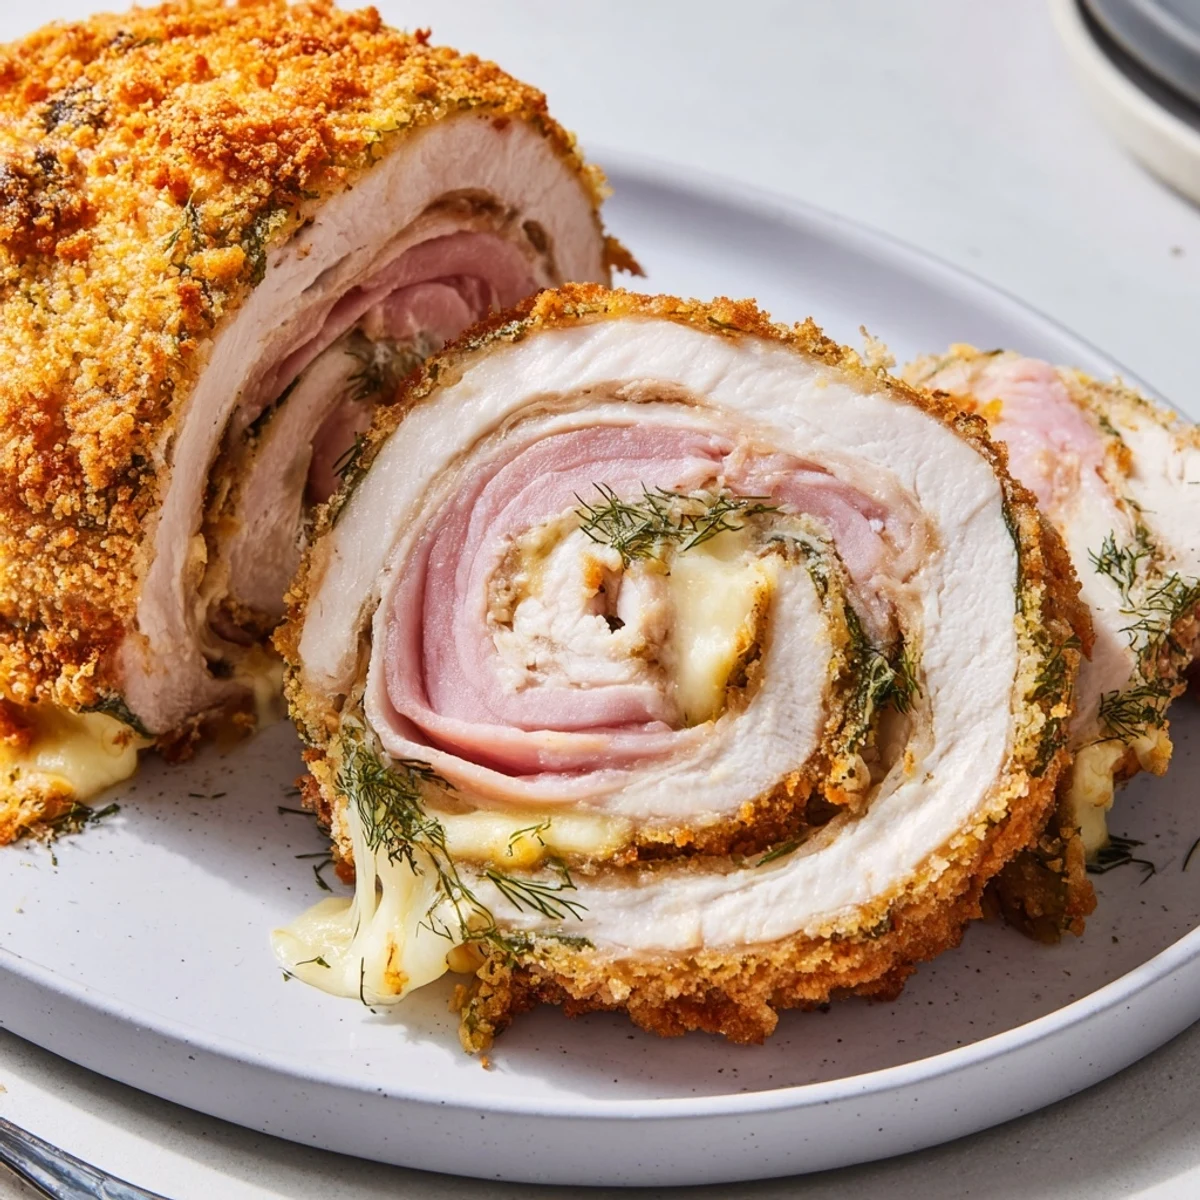
 Pickle-brined chicken breasts soak up tangy flavor during a 1–4 hour brine, then are butterflied, layered with cheese and herbs, rolled, secured and breaded. Fry briefly to develop a golden crust and finish in the oven for even doneness, or bake directly for a lighter finish. Let rest before slicing; serve with potato salad, slaw, or roasted vegetables. Swap ham for prosciutto or choose gluten-free crumbs as needed.
My neighbor Dave brought over a jar of his homemade dill pickles last summer and challenged me to do something with the leftover juice instead of pouring it down the drain. Three batches later, I had a new obsession: pickle brined chicken rolls that crunch like fried chicken but carry this sneaky tang that makes everyone ask what the secret is. The cheese melting out the sides does not hurt either. This recipe has since become my contribution to every potluck within a ten mile radius.
I made these for my sister when she was eight months pregnant and she literally groaned at the table, then ate two whole rolls before touching her salad. My brother in law looked at me like I had performed a magic trick. I had not told him about the pickle juice yet and watching him try to guess the secret ingredient over three rounds of leftovers is still one of my favorite dinner memories.
Ingredients
- Pickle juice (1 cup): Use the juice from actual dill pickles, not a jar of just vinegar. The garlic and dill already floating in there are doing more work than any seasoning you could mix yourself.
- Sugar (1 tablespoon): This balances the sharpness of the brine so the chicken tastes tangy, not sour. Skip it and you will notice.
- Black peppercorns (1 teaspoon): Toss them in whole so they perfume the brine without making it gritty.
- Chicken breasts (4 boneless, skinless): Try to pick ones that are roughly the same size so they brine and cook evenly. Ragged thin edges are your friend here because they roll up easier.
- Swiss or provolone cheese (4 slices): Provolone melts a bit creamier but Swiss gives a sharper bite. Either way, do not skimp on this layer.
- Deli ham, optional (4 slices): Think of this as a cordon bleu shortcut. Prosciutto works too if you want to feel fancy.
- Fresh dill or parsley (2 tablespoons, chopped): Fresh herbs matter here because they brighten the richness. Dried will not give you the same pop.
- All purpose flour (1 cup): The first coat that helps the egg stick. Rice flour works too if you want an even crispier shell.
- Eggs (2 large, beaten): The bridge between flour and breadcrumbs. Keep them in a wide shallow bowl for easier rolling.
- Panko breadcrumbs (1 and a half cups): Panko is non negotiable if you want that airy, shattering crunch. Regular breadcrumbs will leave you with a dense, sad coating.
- Garlic powder (1 teaspoon) and smoked paprika (half teaspoon): Mixed into the panko, these two turn plain breading into something people will keep tasting off their fingers.
- Vegetable oil or melted butter (quarter cup): For frying you need enough oil to come halfway up the rolls. For baking, a generous drizzle of butter over the tops gives you color and richness without the stovetop splatter.
Instructions
- Brine the chicken:
- Combine the pickle juice, sugar, and peppercorns in a large bowl or zip top bag, then submerge the chicken breasts and refrigerate for at least one hour or up to four. The longer you wait, the more tangy and tender the meat becomes, but do not go past four hours or it turns mushy.
- Preheat the oven:
- If you are baking, set your oven to 400 degrees Fahrenheit and line a sheet pan with parchment paper so nothing sticks later.
- Pound and flatten:
- Pull the chicken from the brine, pat each piece thoroughly dry with paper towels, and butterfly them by slicing horizontally almost all the way through so they open like a book. Sandwich each one between two sheets of plastic wrap and pound gently with a mallet to a quarter inch thickness, working from the center outward so you do not tear the meat.
- Build the rolls:
- Lay a slice of cheese and ham on each flattened breast, scatter the herbs over the top, and season lightly with salt and pepper. Roll each one up as tightly as you can manage, tucking the edges in, and skewer with toothpicks to hold everything shut during cooking.
- Set up the breading station:
- Line up three shallow bowls: flour in the first, beaten eggs in the second, and panko mixed with garlic powder and smoked paprika in the third. Keep one hand dry for the flour and panko, one wet for the egg, unless you enjoy breading your own fingers.
- Coat each roll:
- Roll each chicken log through the flour first, shake off the excess, dunk it completely in egg, then press it firmly into the panko mixture until every inch is covered. Set them on a plate or tray as you finish each one.
- Cook until golden:
- For the fry then bake method, heat oil in a skillet over medium heat and brown the rolls on all sides for about three to four minutes per side, then transfer to the oven for fifteen minutes until cooked through. For baking only, arrange the rolls on your prepared sheet pan, drizzle generously with melted butter or oil, and bake twenty five to thirty minutes until the coating is deeply golden and the internal temperature hits 165 degrees.
- Rest and serve:
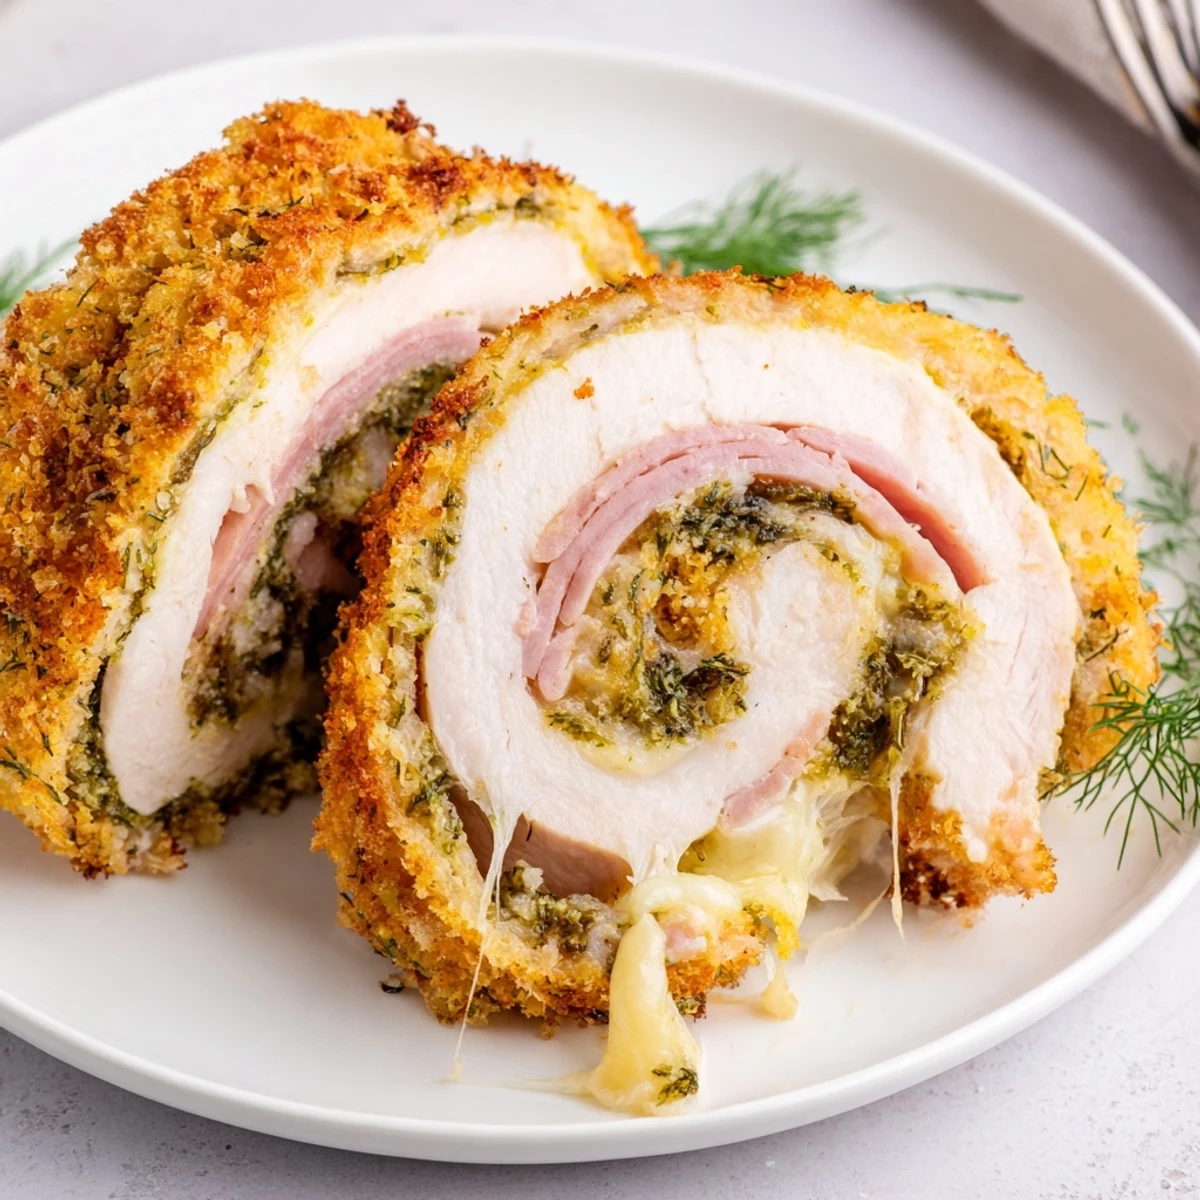
- Let the rolls sit for five minutes before slicing so the cheese does not immediately pour out, then cut into thick pinwheels and serve while everything is still hot and melty.
 Save to Pinterest
 The first time I got the roll tight enough to slice into perfect pinwheels, I stood at the counter photographing them from three different angles like a proud parent. My dog sat at my feet waiting for a dropped piece and I do not think I have ever felt more accomplished over breaded chicken.
What to Serve Alongside
These rolls pair beautifully with a simple potato salad or crunchy coleslaw that can stand up to the richness of the fried coating. A light vinaigrette dressed green salad works too if you want to pretend you are being virtuous. In summer I pile everything onto a big platter outside and let people graze with cold drinks in hand.
Making It Gluten Free
Swap the all purpose flour for a one to one gluten free blend and use certified gluten free panko, which is easier to find now than it was even two years ago. The texture will be slightly different but still satisfying, and honestly most people will not notice unless you tell them. Rice flour in particular gives an exceptionally crispy crust that some people actually prefer over wheat flour.
Storage and Reheating
Leftover rolls keep well in the refrigerator for up to three days and reheat best in a 375 degree oven or air fryer for about ten minutes to bring back the crunch. The microwave works in a pinch but you will lose the crispy exterior and honestly that is the best part.
- Freeze unbaked rolls on a sheet pan first, then transfer to a freezer bag for up to two months, baking straight from frozen with an extra ten minutes added.
- Day old cold rolls sliced thin make an incredible sandwich filling on crusty bread with extra pickles.
- Always check that the internal temperature reaches 165 degrees Fahrenheit no matter which cooking method you choose.
 Save to Pinterest
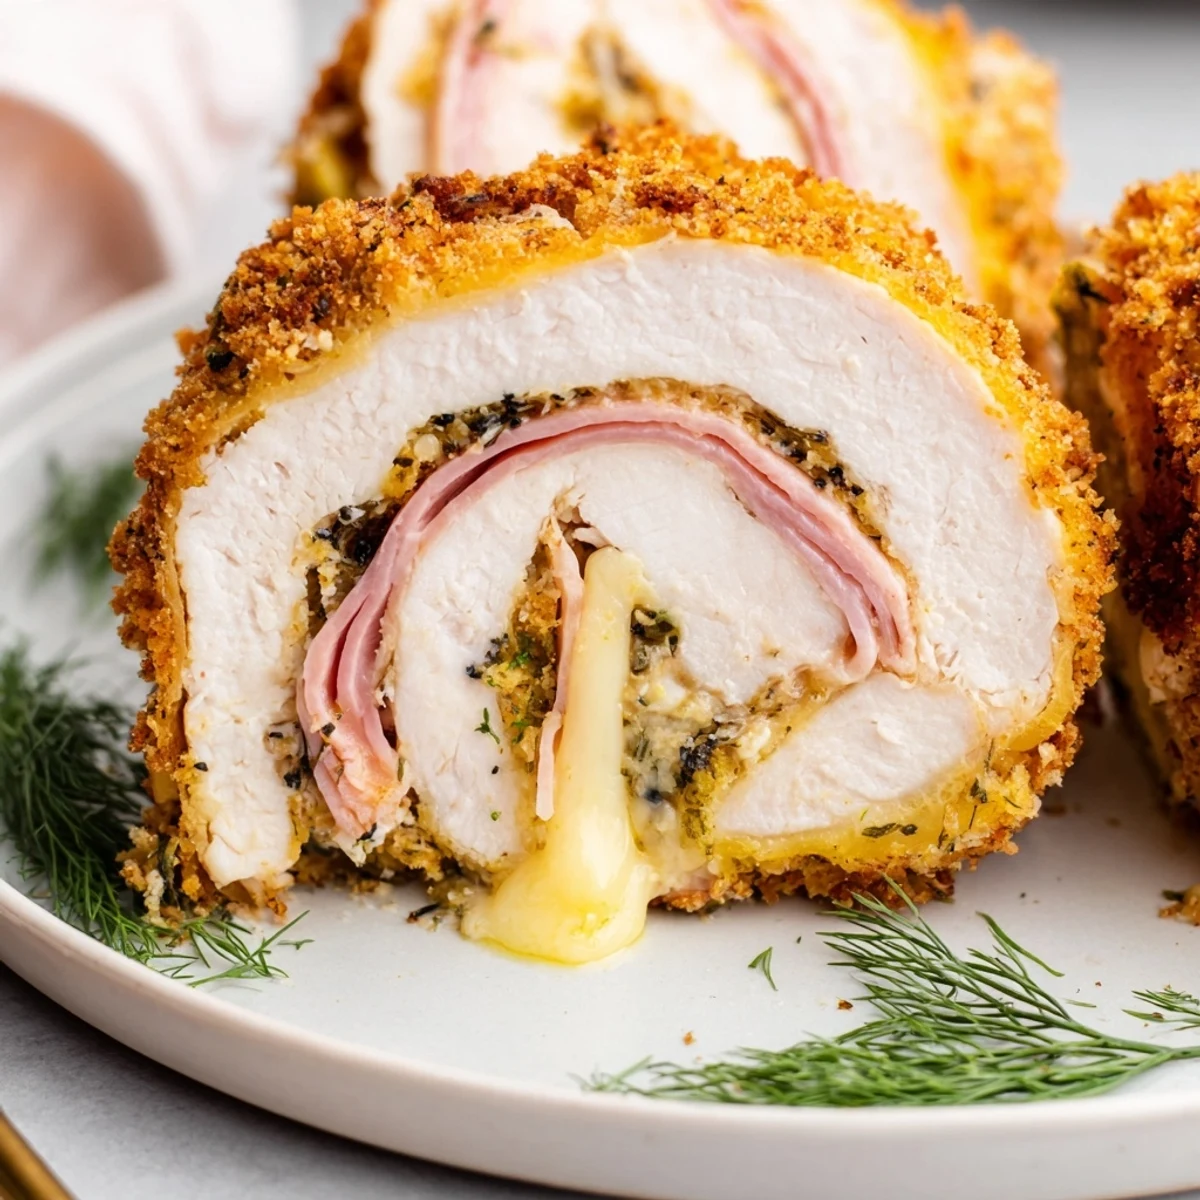
 Once you taste what pickle juice can do for plain chicken, you will start brining everything in sight and I fully support that journey. Share these rolls with someone who thinks they do not like pickles and watch their face change with the first bite.
Questions & Answers
- → How long should I brine the chicken?
-
Brine for at least 1 hour to impart tang and moisture; up to 4 hours is fine for deeper flavor. Avoid much longer to prevent an overly salty or mushy texture.
- → Can I bake instead of frying?
-
Yes. For a lighter finish, bake at 400°F (200°C) for 25–30 minutes, drizzling with oil or melted butter to encourage browning. For crispier results, pan-sear first then finish in the oven.
- → How do I keep the coating crisp?
-
Pat chicken dry after brining, use a proper dredge sequence (flour, egg, breadcrumbs), and avoid overcrowding the pan. If baking, a light drizzle of oil helps the crumbs brown and crisp.
- → What cheeses work best for stuffing?
-
Swiss, provolone, or mild cheddar melt well and complement the pickle tang. For a bolder note try pepper jack or smoked gouda; avoid very soft, runny cheeses that may leak during cooking.
- → Can these be made ahead and reheated?
-
Yes. Bake fully, cool, then refrigerate. Reheat in a 350°F (175°C) oven to keep the coating crisp, or reheat gently in a skillet. Avoid microwaving if you want to preserve texture.
- → How can I make this gluten-free?
-
Use gluten-free all-purpose flour and gluten-free panko or breadcrumbs. Ensure any deli ham or other packaged ingredients are labeled gluten-free.