 Save to Pinterest
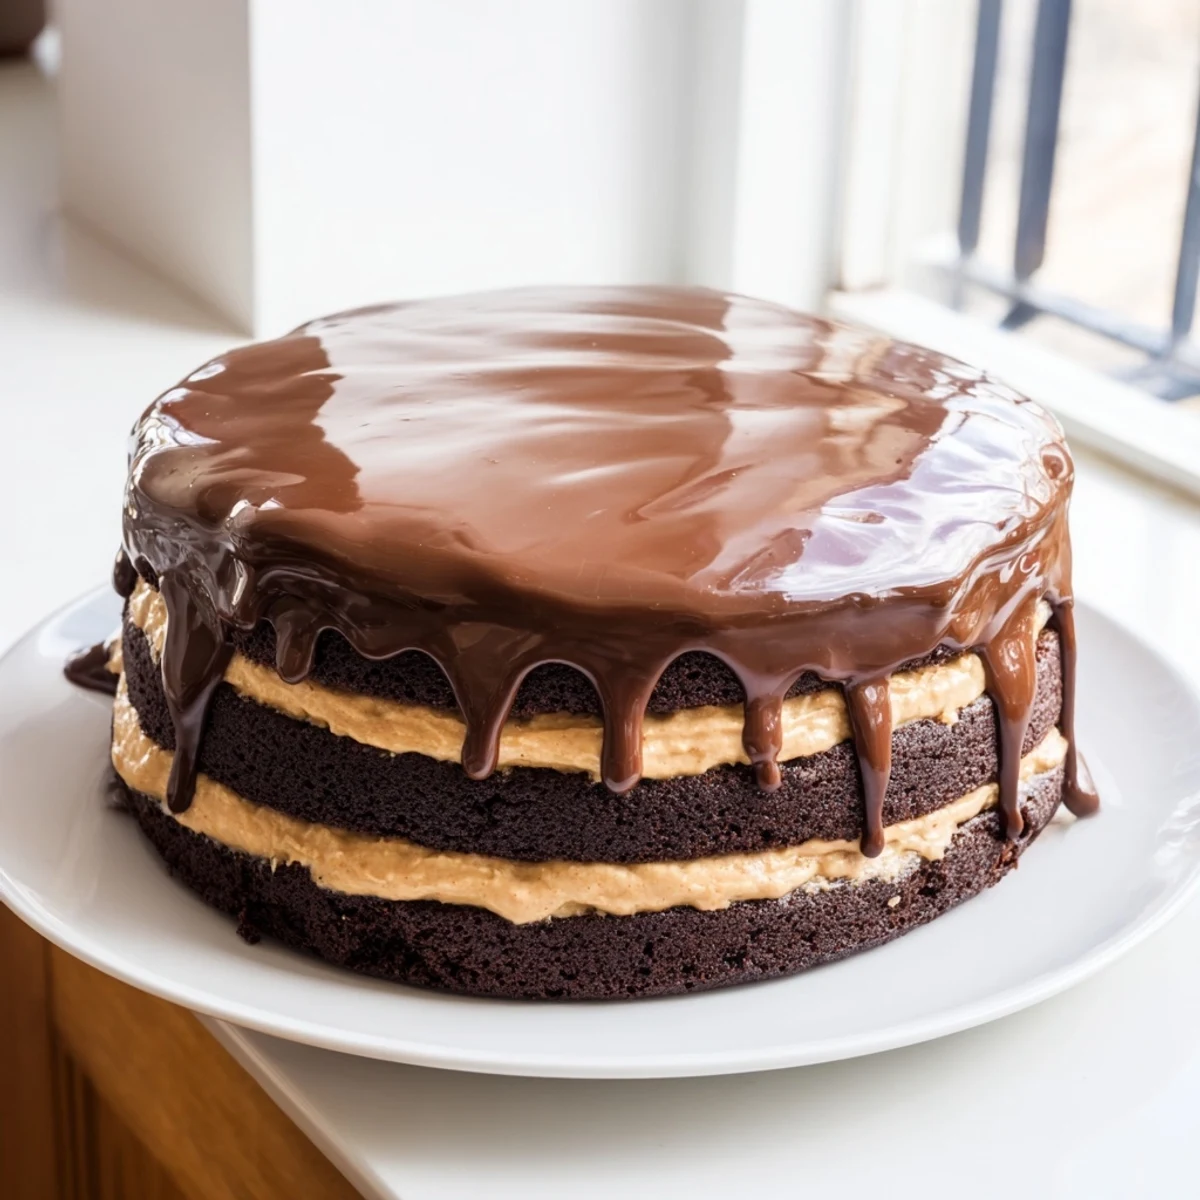
 This indulgent triple-layer chocolate cake brings the famous Matilda movie dessert to your kitchen. Three moist chocolate sponge cakes are stacked with velvety chocolate buttercream frosting, then crowned with a glossy ganache that drips dramatically down the sides. Hot coffee in the batter intensifies the chocolate flavor, while buttermilk ensures tender crumbs. The result is a stunning showstopper that tastes even better than it looks.
The smell of chocolate baking has this way of stopping everyone in their tracks, demanding they come see what's happening in the kitchen. I remember making this cake during a rainy weekend, little faces pressed against the oven door watching the layers rise like magic. That moment when you pour the hot coffee into the cocoa and the whole kitchen fills with this deep, rich aroma—thats the part nobody tells you about, but it's what makes the cake sing.
My friend actually cried when she saw the ganache dripping down the sides at her birthday party, and I'm still not sure if it was joy or just chocolate overload. We lit candles and watched the wax melt while everyone pretended to wait patiently, but really they were all just eyeing that glossy chocolate top. The best part was cutting into it—seeing those three perfect layers standing tall like they knew exactly what they were doing.
Ingredients
- 2 ½ cups all-purpose flour: Sifting this with the cocoa powder prevents any lumps and gives you that velvety smooth crumb
- 1 ½ cups unsweetened cocoa powder: Use a high-quality brand here because it's the star of the show and you'll taste the difference
- 2 ½ cups granulated sugar: This might seem like a lot but chocolate needs sweetness to balance its natural bitterness
- 2 ½ tsp baking powder: Working with baking soda, this gives your layers that beautiful rise
- 1 ½ tsp baking soda: The buttermilk activates this, creating those tender, airy pockets in the crumb
- 1 tsp fine salt: Chocolate absolutely needs salt to pop, it's like turning up the volume on all the flavors
- 1 cup buttermilk: Room temperature is crucial here, and its acidity is what makes the cake so incredibly tender
- 1 cup hot coffee: Don't worry—it doesn't taste like coffee, it just intensifies the chocolate flavor
- ½ cup vegetable oil: Oil keeps the cake moist longer than butter would, which is key for a multi-layer cake
- 4 large eggs: These also need to be at room temperature so they incorporate evenly into the batter
- 2 tsp pure vanilla extract: Always use pure—fake vanilla has a weird aftertaste that shows up in chocolate
- 1 cup unsalted butter: Softened to room temperature so it whips up fluffy and light
- 3 ½ cups powdered sugar: Sift this first or you'll have tiny sweet lumps in your frosting
- ⅓ cup whole milk: Add this gradually until you reach your perfect spreading consistency
- 8 oz semisweet chocolate: Finely chopped so it melts evenly and quickly into the cream
- 1 cup heavy cream: Heat this until just before it boils—bubbles around the edges are your cue
- 2 tbsp unsalted butter: This gives the ganache that glossy, pourable finish
Instructions
- Get your pans ready:
- Rub softened butter all over three 8-inch pans, line the bottoms with parchment circles, and dust the sides with cocoa powder for extra insurance.
- Whisk together the dry team:
- Sift flour, cocoa, sugar, baking powder, baking soda, and salt into a giant bowl—this step feels endless but your arms will thank you later.
- Mix the wet ingredients:
- Whisk buttermilk, hot coffee, oil, eggs, and vanilla until they're fully friends and the mixture looks uniform.
- Bring them together:
- Pour wet into dry and fold gently until just combined—some streaks are okay, but you don't want to see any dry flour pockets.
- Divide and conquer:
- Use a scale if you have one to split batter evenly between the pans, then smooth the tops with an offset spatula.
- Bake until perfect:
- Slide those pans into a 350°F oven for 30 to 35 minutes, until a toothpick comes out with just a few moist crumbs.
- The patience part:
- Let cakes cool in their pans for exactly 10 minutes, then turn them out onto wire racks to cool completely—don't rush this or your frosting will melt.
- Make the frosting:
- Beat butter until creamy, then gradually add powdered sugar and cocoa, pouring in milk and vanilla until it's light and spreadable.
- Create the ganache:
- Heat cream until tiny bubbles form around the edges, pour over chopped chocolate and butter, wait two minutes, then whisk until impossibly smooth.
- Stack and frost:
- Place your first layer on a plate, spread frosting to the edges, repeat with the second layer, then frost the top and sides of the whole cake.
- The dramatic finish:
- Pour that glossy ganache over the top and watch it cascade down the sides—let it do its thing without trying to perfect it.
- Set the stage:
- Chill the whole cake for 20 to 30 minutes so the ganache sets up beautifully before you slice into it.
 Save to Pinterest
 This cake showed up at my sister's graduation party and honestly, the fancy catering was completely upstaged. People kept asking where I bought it, and when I said I made it myself, the look of impressed disbelief was absolutely worth every whisk of effort. Now it's the go-to for every celebration worth celebrating.
Making It Ahead
You can bake the cake layers a day ahead and wrap them tightly in plastic wrap—they actually develop better flavor overnight. The frosting and ganache also keep well in the fridge, just bring them to room temperature before using.
Getting Those Perfect Layers
If your layers dome in the middle, use a serrated knife to level them while they're still slightly warm. This small step makes stacking so much easier and prevents your cake from looking like the Leaning Tower of Pisa.
Serving Suggestions
This cake is rich on its own, but a cold glass of milk cuts through all that intense chocolate beautifully. A few fresh berries on the plate add brightness and make the presentation feel complete.
- Let slices come to room temperature for 15 minutes before serving
- Use a hot knife to get those picture-perfect clean cuts
- Dust the top with cocoa powder or edible gold for extra drama
 Save to Pinterest
 There's something deeply satisfying about cutting into a triple-layer cake you made from scratch, watching everyone's eyes light up at that first chocolate-rich bite. Some desserts are just worth the effort, and this one absolutely earns every moment you spend with it.
Questions & Answers
- → What makes this cake inspired by Matilda?
-
The triple-layer chocolate cake references the iconic scene from the Matilda movie where Bruce Bogtrotter is forced to consume an enormous chocolate cake. This version captures that same indulgent spirit with three layers of rich chocolate sponge, creamy frosting, and glossy ganache.
- → Why add coffee to chocolate cake batter?
-
Hot coffee enhances the chocolate flavor without adding a coffee taste. The heat helps bloom the cocoa powder, releasing its natural oils and intensifying the rich chocolate notes in the finished cake.
- → Can I make this cake in advance?
-
Yes! The cake layers can be baked and wrapped in plastic for up to 2 days before assembly. The frosting and ganache can also be prepared ahead and stored refrigerated. Assemble the cake no more than a day before serving for the freshest taste and texture.
- → How do I get the ganache to drip perfectly?
-
The key is temperature. Let the ganache cool until it's thickened but still pourable—like warm honey. Pour it in the center of the frosted cake and use a spoon to gently push it toward the edges, allowing gravity to create those beautiful drips down the sides.
- → What's the best way to store this chocolate cake?
-
Refrigerate the assembled cake in an airtight container or cake dome for up to 4 days. The buttercream and ganache need cool temperatures to maintain their texture. Bring slices to room temperature for 20 minutes before serving for the best flavor and mouthfeel.
- → Can I freeze the cake layers?
-
Absolutely! Wrap each cooled cake layer tightly in plastic wrap, then foil, and freeze for up to 3 months. Thaw overnight in the refrigerator before frosting and assembling. Frozen layers are actually slightly easier to stack and frost without crumbly edges.