 Save to Pinterest
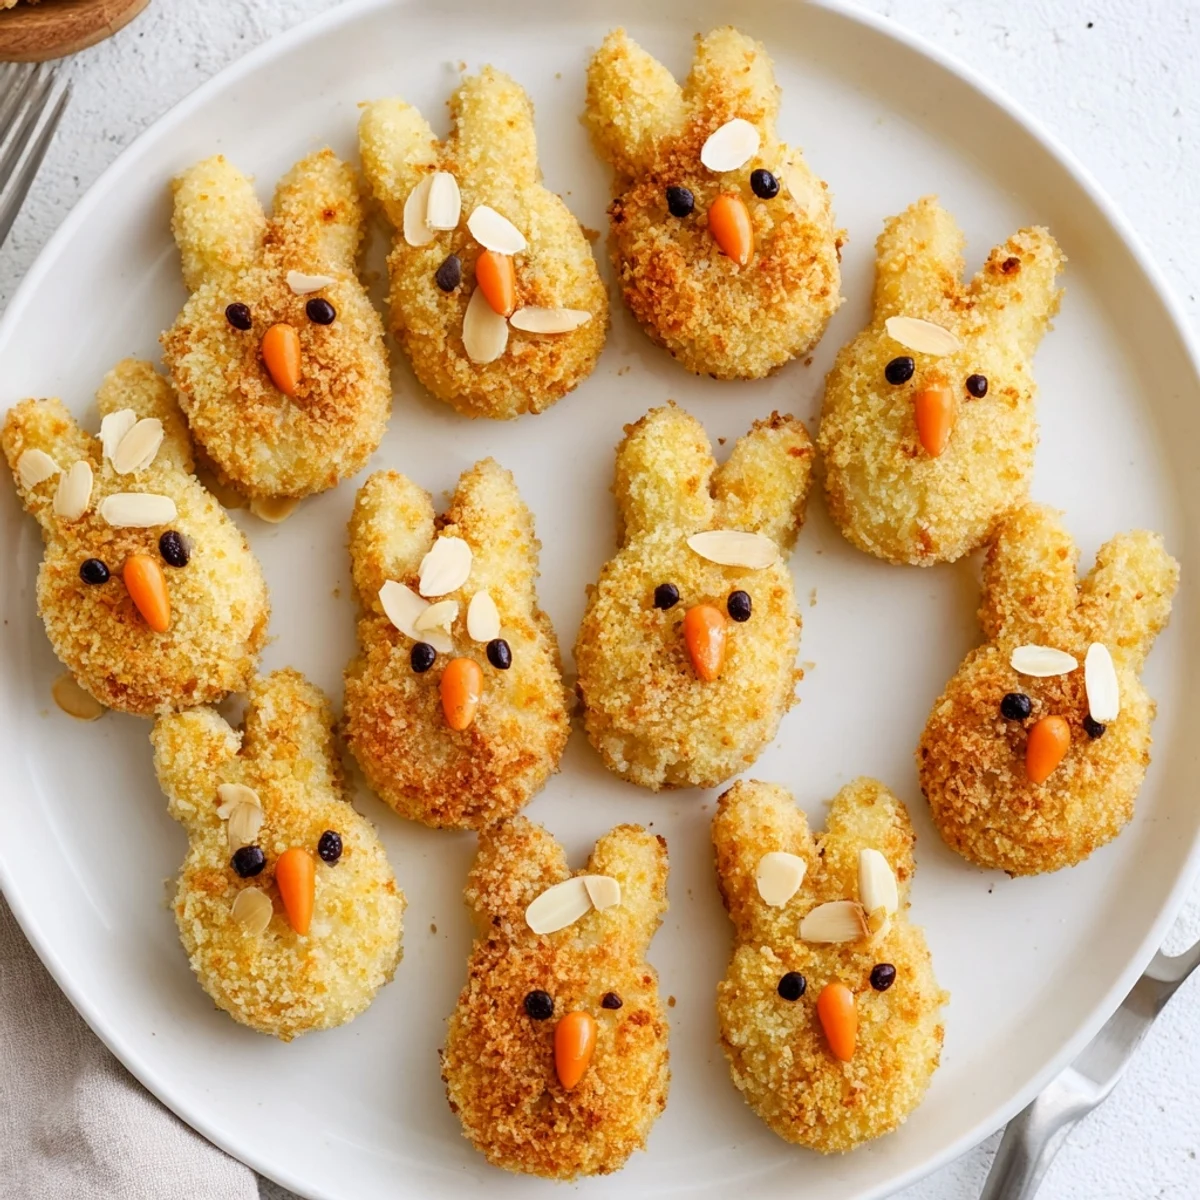
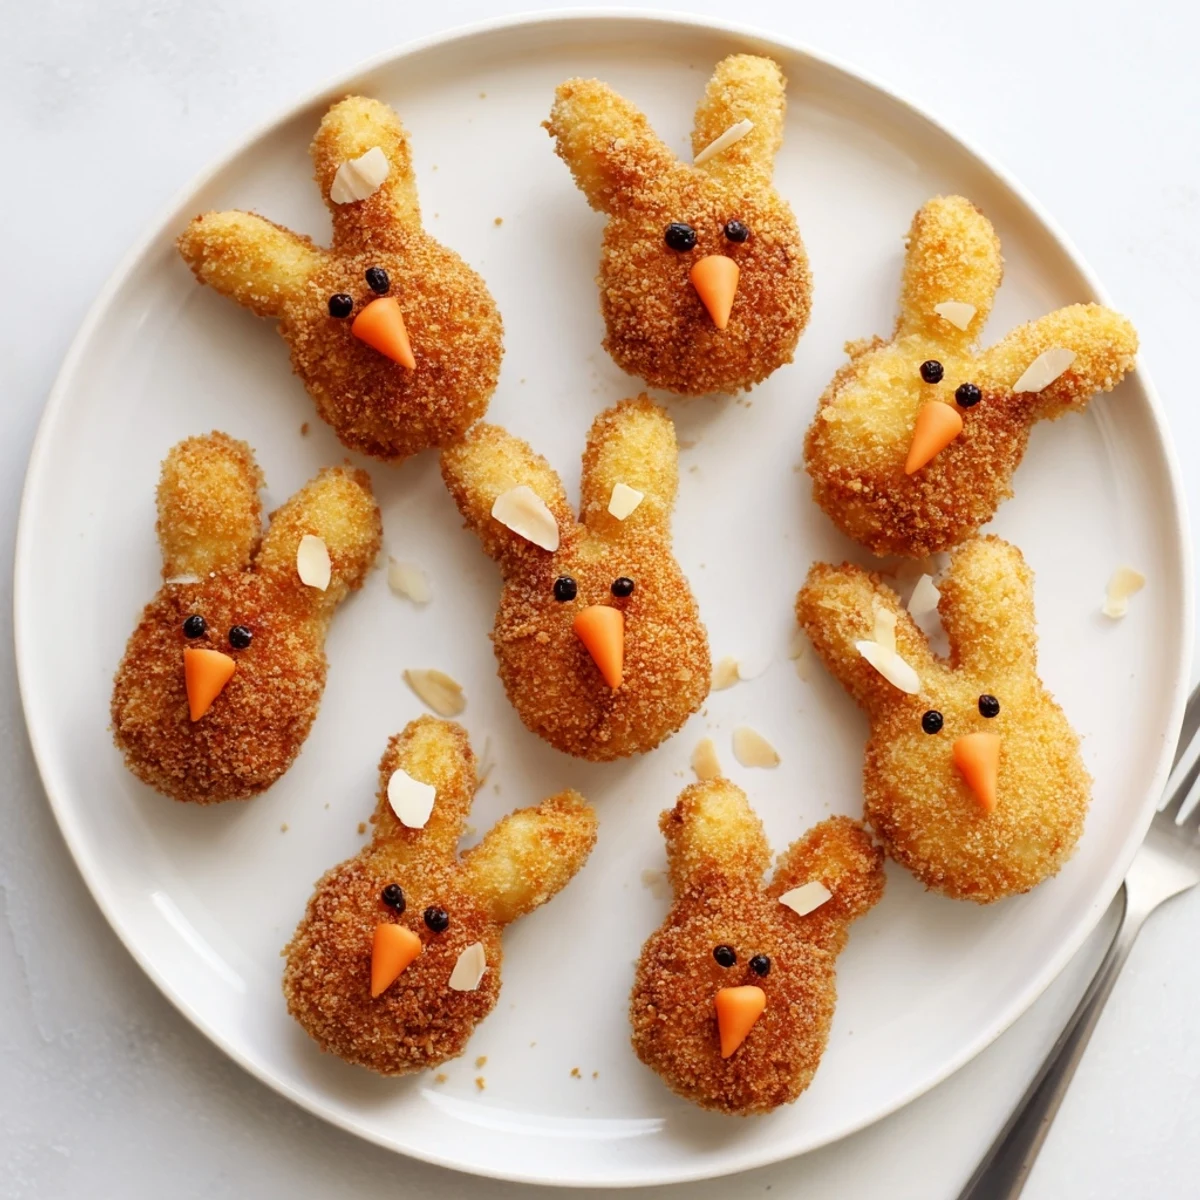
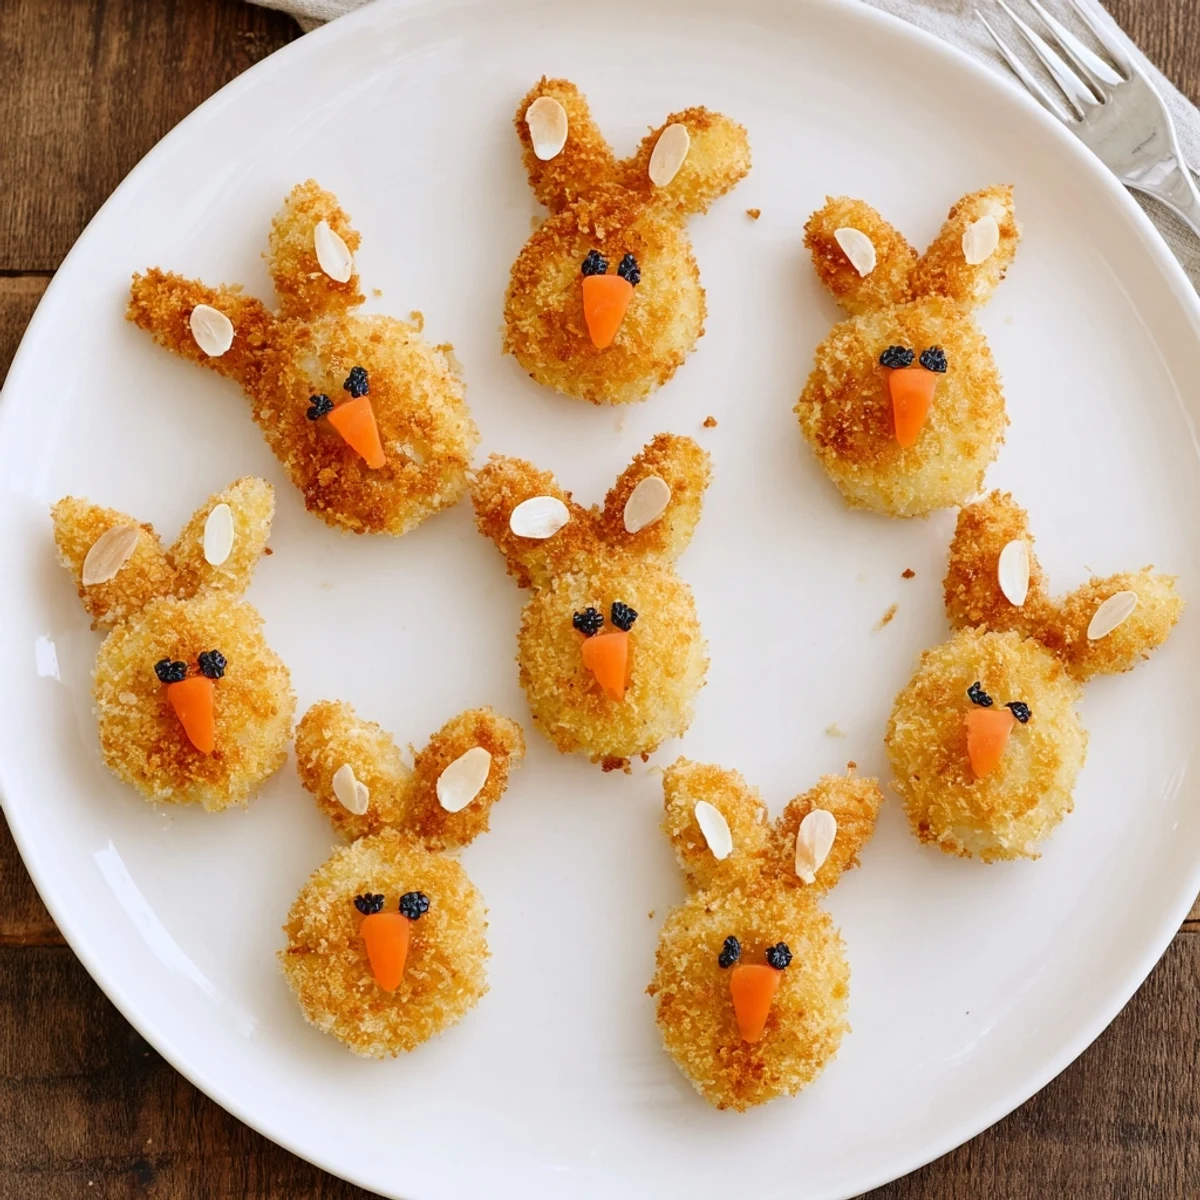
 These delightful golden potato morsels bring whimsy to your Easter celebration. Fluffy mashed potatoes blend with buttery Parmesan and aromatic nutmeg, shaped into adorable bunny heads complete with almond ears, peppercorn eyes, and carrot noses. The triple coating creates irresistible crunch while keeping interiors velvety smooth.
Fry until perfectly golden for crowd-pleasing appetizers that disappear fast. Little hands love helping shape and decorate these festive bites. Serve alongside herbed sour cream or zesty aioli for dipping.
My youngest cousin begged me to make something special for our Easter potluck last year. She had seen these bunny potato croquettes in a storybook and wouldn't stop talking about them. I stayed up late experimenting with shapes, learning quickly that almond ears are surprisingly delicate creatures to work with. When I brought out that platter of golden bunnies, the table went quiet for exactly three seconds before everyone reached for their phones to take pictures.
Last Easter, my kitchen turned into what looked like a potato production line with cousins, aunts, and uncles all crowded around the counter. Someone was in charge of whisking eggs, another person managed the panko station, and the kids took their job as chief bunny decorators very seriously. We ended up with some decidedly lopsided rabbits and a few with perpetually surprised expressions, but nobody seemed to mind when they were biting into that warm, cheesy potato center.
Ingredients
- Russet potatoes: These starchy potatoes create the fluffiest interior and hold their shape better than waxy varieties during frying
- Unsalted butter: Adding this while the potatoes are still hot helps it melt evenly and creates that luxurious smooth texture
- Egg yolks: The extra fat and richness from yolks helps bind everything together while adding depth of flavor
- Grated Parmesan: This brings a salty, umami note that makes the plain potato base taste special and sophisticated
- Ground nutmeg: Just a pinch adds a subtle warmth that makes people wonder what makes these taste so comforting
- All-purpose flour: Creates the first layer of coating that helps the egg wash adhere properly to the potato surface
- Beaten eggs: The essential middle layer that acts as the glue between flour and crispy panko breadcrumbs
- Panko breadcrumbs: These Japanese breadcrumbs stay lighter and crunchier than traditional ones, giving that satisfying crunch
- Sliced almonds: Perfectly shaped ears that toast beautifully in the fryer and add a nice nutty element
- Black peppercorns: These create the beady little eyes that give each bunny its personality without affecting flavor much
- Carrot pieces: Tiny orange noses that stay firm during frying and add a pop of color to the golden faces
- Vegetable oil: A neutral oil with a high smoke point is essential for achieving that even golden color without burning
Instructions
- Prepare the potato base:
- Place your diced potatoes in a large pot with generously salted water and bring to a rolling boil. Cook them until they're completely fork-tender, about 15 minutes, because undercooked potatoes will create lumpy croquettes that fall apart during shaping.
- Mash and season:
- Drain the potatoes well and let them sit in the hot pot for a couple minutes to steam off excess moisture. Mash them until completely smooth, then mix in the butter, egg yolks, Parmesan, salt, pepper, and nutmeg until you have a uniform, seasoned dough.
- Shape your bunnies:
- Let the mixture cool until you can handle it comfortably, then divide into 12 equal portions. Roll each into an oval shape and form two small ear pieces, attaching them carefully to the top with gentle pressure to help them stick.
- Add the faces:
- Press two almond slices into the top for ears, then add two peppercorns or olive pieces for eyes and a small carrot triangle for the nose. Be gentle but firm enough that the decorations will stay put through the breading process.
- Set up your breading station:
- Arrange three shallow bowls with the flour, beaten eggs, and panko breadcrumbs in that order. Keep one hand dry for the flour and panko, and use the other hand for the egg wash to keep your fingers from getting completely coated in breading.
- Coat the croquettes:
- Dredge each bunny carefully in flour, shaking off excess, then dip in the beaten egg until coated, and finally press into the panko to cover completely. Place each breaded bunny on a clean plate while you finish the rest.
- Fry to golden perfection:
- Heat your vegetable oil to 170°C (340°F) and fry the croquettes in batches, about 2 to 3 minutes per side. Watch for that beautiful golden brown color and listen for the sizzling to slow down slightly as the crust becomes crisp.
- Drain and rest:
- Remove each batch with a slotted spoon and drain on paper towels to remove excess oil. Let them cool for just a few minutes so the decorations set and the inside finishes cooking gently.
 Save to Pinterest
 What started as a silly Easter experiment has now become a twice-a-year tradition in our house. My niece still talks about 'the year we made the bunny potatoes' like it was some major family event, and honestly, looking back at those slightly lopsided, almond-eared creatures on our Easter table, maybe it was. Food has this way of turning ordinary moments into the kind of memories that stick around long after the leftovers are gone.
Making These Ahead
You can shape and decorate the bunnies up to 24 hours ahead, storing them uncovered on a baking sheet in the refrigerator. The cold air actually helps firm up the surface, making them easier to bread and fry later. Just let them sit at room temperature for about 15 minutes before breading so the condensation doesn't make the flour gummy.
Serving Suggestions
These croquettes are fantastic with a simple herb sour cream or a garlic aioli for dipping. The cool, creamy sauce balances perfectly with the hot, crispy exterior. They also pair beautifully with a light spring salad dressed with lemon vinaigrette, which cuts through the richness of the fried potato and cheese.
Common Questions
Everyone asks about making these gluten-free, and yes, it works beautifully with gluten-free flour and breadcrumbs. The texture stays surprisingly close to the original. Some readers have also successfully baked these at 200°C (400°F) for about 20 minutes, flipping halfway, though they won't achieve quite the same crunch as frying.
- Keep the oil temperature steady throughout frying
- Use a kitchen thermometer rather than guessing
- Let guests add their own choice of dipping sauce
 Save to Pinterest
 There's something undeniably joyful about food that makes people smile before they even take a bite. These little potato bunnies might take some extra time to shape, but watching family and friends light up when they see them makes every minute worth it.
Questions & Answers
- → Can I prepare these potato bunnies ahead of time?
-
Absolutely. Shape and bread the potato forms up to 24 hours ahead. Store covered in refrigerator on parchment-lined trays. Fry just before serving for maximum crispiness. The decorations stay fresh when chilled properly.
- → What's the best potato variety for fluffy interiors?
-
Russet or baking potatoes work beautifully due to their high starch content and low moisture. These varieties create light, fluffy mash that holds shape well during forming and frying while staying creamy inside.
- → Can I bake instead of fry these Easter treats?
-
Baking works well for lighter versions. Brush generously with oil and bake at 200°C (400°F) for 20-25 minutes, flipping halfway. The texture becomes less crispy than frying but remains delicious and family-friendly.
- → How do I prevent decorations from falling off during cooking?
-
Press almond slices, peppercorns, and carrot pieces firmly into the potato mixture before breading. The flour-egg-panko coating helps secure everything. Avoid overcrowding the fryer to prevent knocking decorations loose.
- → What dipping sauces complement these golden bites?
-
Herbed sour cream with fresh dill and chives enhances the creamy potato interior. Garlic aioli adds richness, while whole-grain mustard provides tangy contrast. Even simple ketchup appeals to younger guests.
- → Can I freeze these for later?
-
Freeze successfully after breading but before frying. Arrange in single layers on trays until firm, then transfer to freezer bags for up to 3 months. Fry directly from frozen, adding 1-2 minutes to cooking time.