 Save to Pinterest
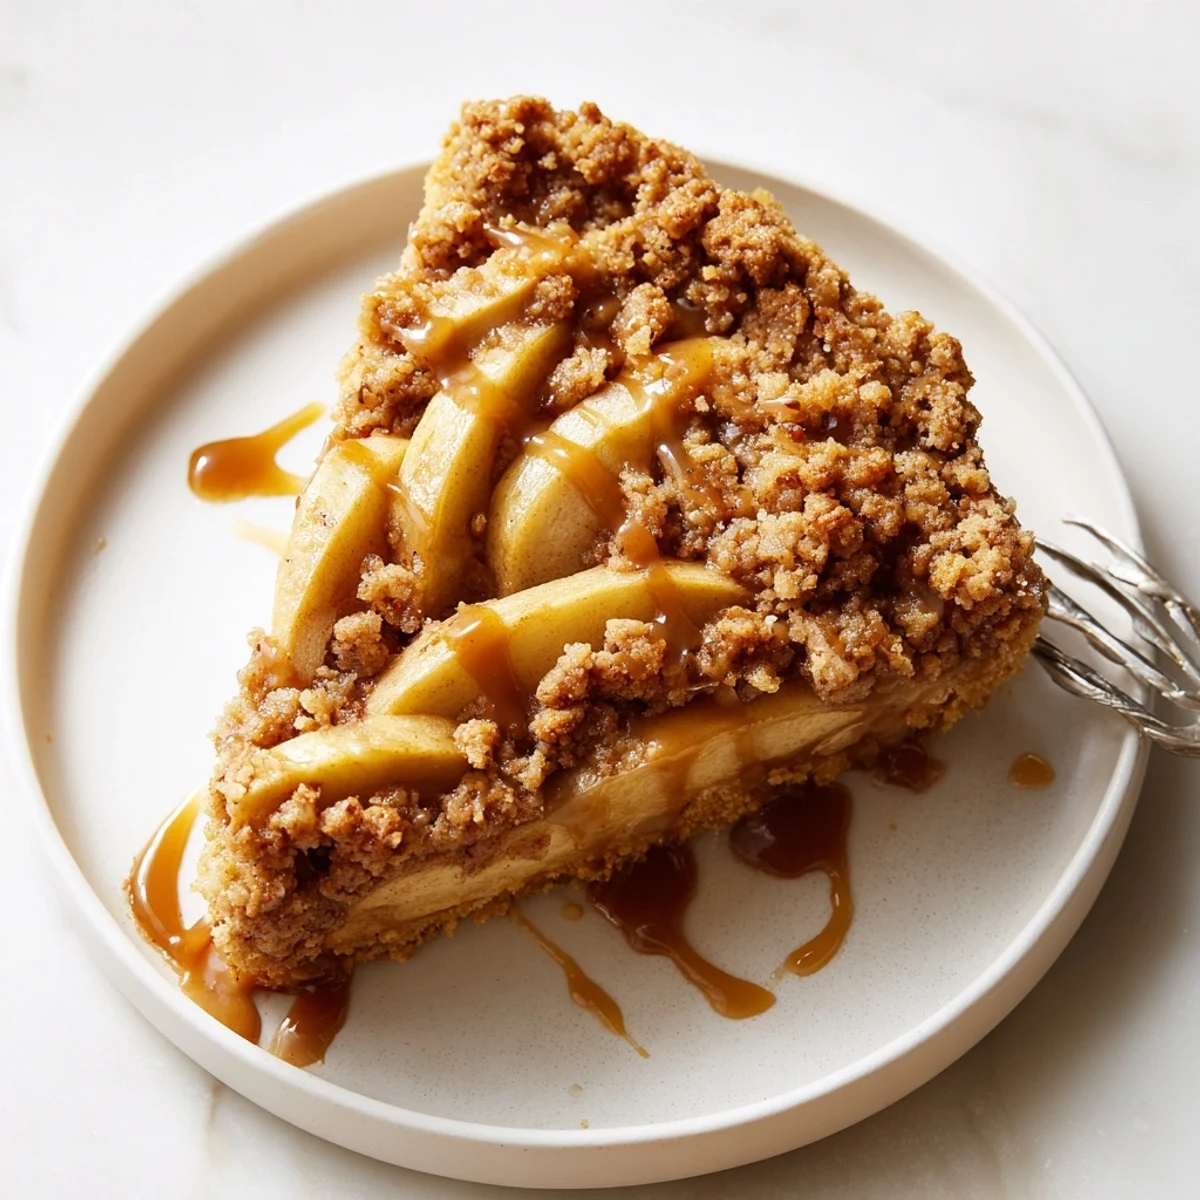
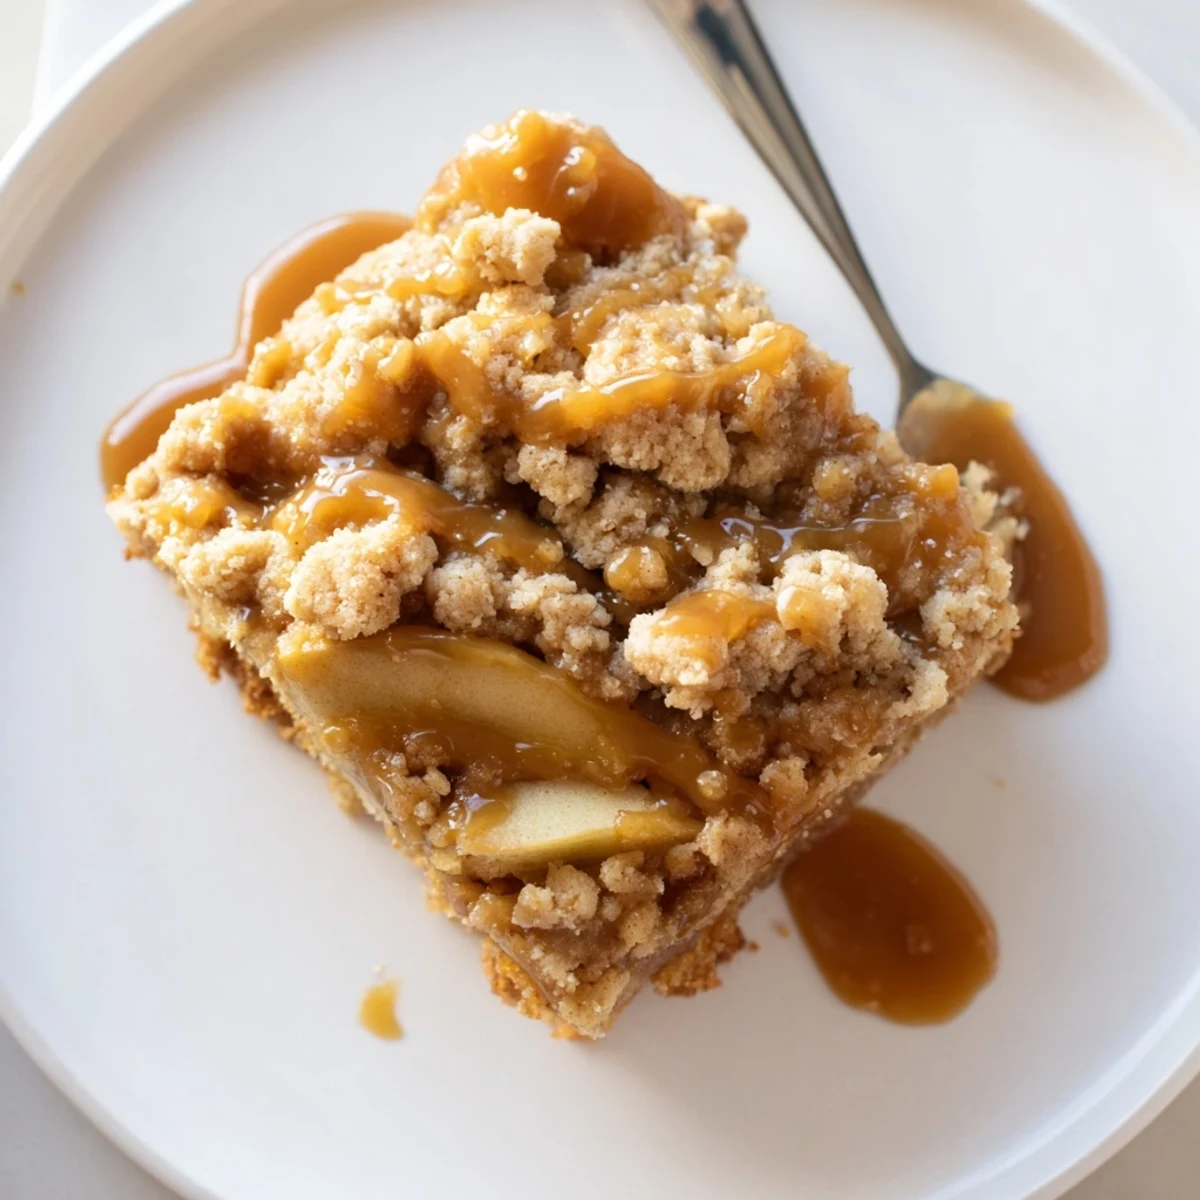
 These caramel apple crumb bars feature three delicious layers: a tender vanilla shortbread crust, spiced apple filling with fresh slices, and a buttery crumb topping all held together with rich caramel sauce. Perfect for autumn gatherings, potlucks, or holiday baking, these bars combine the classic flavors of apple pie in an easy-to-serve format. The crust doubles as the crumble topping, simplifying preparation while ensuring maximum flavor.
The bars require about 25 minutes of active prep time and 40 minutes in the oven. They're best served slightly warmed with extra caramel drizzled on top. Store in an airtight container for up to three days, though they rarely last that long. The combination of tart and sweet apples creates the perfect balance against the sweet caramel and buttery crumb layers.
The first time I made these caramel apple crumb bars, my kitchen smelled like an orchard in autumn. Something about buttery dough meeting warm cinnamon apples feels like home, no matter the season. I'd spent all afternoon chopping apples and my fingers were sticky with caramel, but pulling that golden pan from the oven made every second worth it.
My neighbor texted me the moment I opened my windows that day, asking what on earth I was baking. I brought over a still warm bar and she texted back five minutes later saying she'd hidden the rest from her husband. These have become my go to when I need something that feels special but doesn't require pastry skills I don't actually possess.
Ingredients
- All purpose flour: The backbone of both crust and crumb, giving structure that holds up to those juicy apple layers without getting soggy
- Cold unsalted butter: Keep it icy cold so it creates those pockets of steam that make the crumb topping impossibly tender and flaky
- Granulated sugar: Sweetens the dough just enough to let the apples shine while providing that perfect cookie like texture
- Salt: A half teaspoon might seem small but it's what keeps these from tasting like a generic dessert and instead like something thoughtful
- Vanilla extract: The secret background note that marries everything together and makes people ask what makes these different
- Medium apples: Thinly sliced so they cook through completely during baking, creating that perfect tender but not mushy bite
- Lemon juice: Keeps apples from browning and adds brightness that cuts through all that buttery sweetness
- Ground cinnamon: Warm spice that makes everything taste cozy and familiar, like fall in a single teaspoon
- Caramel sauce: Store bought is absolutely fine, but homemade takes these into no one can stop eating them territory
Instructions
- Get your oven ready:
- Preheat to 350°F and line your 9x9 pan with parchment, letting the edges hang over like little handles that will save your life later
- Make the crumb base:
- Whisk together flour, sugar, and salt in a big bowl, then work in that cold butter with your fingers or a pastry cutter until you have clumps that look like wet sand
- Separate and press:
- Measure out one and a half cups of the mixture and set it aside for topping, then press the rest firmly and evenly into your pan
- Par bake the crust:
- Slide it into the oven for just 12 minutes to set the base so it doesn't turn into a mushy layer under all those apples
- Prep the apples:
- Toss those thin apple slices with lemon juice, sugar, flour, and cinnamon until every piece is coated and looking like it belongs in a pie
- Build the layers:
- Spread apples over your hot crust, drizzle with caramel in whatever pattern makes you happy, then scatter that reserved crumb topping all over
- Bake until golden:
- Return to the oven for 28 to 32 minutes until the top is light golden brown and you can see the apples bubbling slightly underneath
- Patience pays off:
- Let these cool completely in the pan because cutting them warm will give you a messy situation instead of beautiful neat bars
 Save to Pinterest
 These have become my standard contribution to fall potlucks and winter gatherings alike. There's something about the combination of textures that makes people's eyes light up, like they're eating something nostalgic but new all at once.
Picking Your Apples
I've learned that mixing tart Granny Smiths with sweeter Honeycrisp or Gala gives you the perfect balance of acid and sugar. All tart and these bars feel too sharp, all sweet and they become one note and cloying.
The Caramel Situation
Homemade caramel sauce is wonderful but absolutely not required for these to be incredible. The store bought stuff works beautifully, especially if you warm it slightly so it drizzles more evenly over those apples.
Storage and Serving
These keep remarkably well in an airtight container for three days, though I've rarely seen them last that long. Room temperature is perfect, and honestly they're even better on day two when all the flavors have had time to become friends.
- Drizzle extra caramel over individual bars right before serving for that bakery style finish
- A scoop of vanilla ice cream melting over a slightly warm bar is never a bad decision
- These freeze beautifully if you wrap them tightly and want to hide some for yourself
 Save to Pinterest
 There's something deeply satisfying about a dessert that looks impressive but comes together with such straightforward steps. These bars have that magical quality of making people think you spent hours when really you just got your layers in the right order.
Questions & Answers
- → What type of apples work best for these bars?
-
A mix of tart and sweet apples like Granny Smith, Honeycrisp, or Braeburn provides the best flavor balance. The tartness cuts through the sweet caramel while the sweet apples add natural sweetness.
- → Can I use store-bought caramel sauce?
-
Absolutely. Store-bought caramel sauce works perfectly and saves time. Just ensure it's smooth and pourable. If it's too thick, warm it slightly in the microwave before drizzling over the apples.
- → How do I know when the bars are done baking?
-
The bars are done when the crumb topping is light golden brown and you can see the apples bubbling slightly around the edges. The center should feel set but not firm. A total bake time of 28-32 minutes usually achieves this.
- → Can I make these ahead of time?
-
Yes, these bars actually taste better the next day as the flavors meld together. Store them in an airtight container at room temperature for up to 3 days. You can also freeze the unbaked bars and bake fresh when needed.
- → Why is it important to use cold butter?
-
Cold butter creates small pockets of fat in the flour mixture, which results in a tender, flaky texture. When the butter melts during baking, it creates steam that lifts the dough, giving the crust and crumb topping their characteristic crumbly texture.